[fedora20_1 ppt]
리눅스의 특징
1 공개형 오픈 소스의 운영체제
2 다중 사용자 환경지원
3 다중 작업 및 가상 터미널 환경 지원
4 플랫폼에 구애가 없는 운영체제
p8.
Cd, touch 이런 명령어들이 shell 명령어이다
리눅스 운영체제는 크게 커널, 쉘, 사용자 프로그램으로 분류한다
리눅스의 종류는 다양하다
유닉스를 위해 리눅스를 공부하기도 한다
유닉스는 모든os의 기본이 된다
리눅스를 설치하고 가장먼저 해야하는 건 인터넷 연결
연결안된다면 리눅스에서 네트워크카드(NIC)가 안잡히는 것
따라서 가장쉬운방법은 카드를 바꿔보는 것
페도라는 서버보다 워크스테이션을 다운받아야 기능이많다
find 명령어
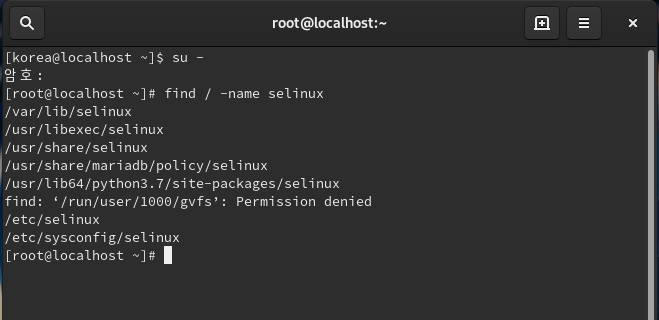
[root@localhost ~]# find / -name selinux
find : 파일을 찾는다
/ : 최상위부터
-name : 이름을 기준으로
/etc/selinux
etc : 설정파일
vi /etc/sysconfig/selinux
/var : 가변길이 디렉토리
vi /etc/passwd
su : 계정변경
bin :실행파일이 있는 디렉토리
pwd : 현재위치확인
httpd.conf
[root@localhost ~]# find / -name httpd.conf
/usr/lib/tmpfiles.d/httpd.conf
find: ‘/run/user/1000/gvfs’: Permission denied
/etc/httpd/conf/httpd.conf
cp : 복사하기
cp /etc/httpd/conf/httpd.conf /root/httpd.conf
ls : 파일 확인하기
cd ~ : 계정의 홈디렉터리로 넘어옴 (/root)
:se nu ->라인번호
vi 편집기는 편집기능이 있는 에디터
cat : 화면출력
[root@localhost ~]# touch httpd2.conf --공백파일 만들기
[root@localhost ~]# cat httpd2.conf --아무것도 안뜸
[root@localhost ~]# cat main.c > httpd2.conf --copy하고 같은역할
[root@localhost ~]# cat httpd2.conf --main.c 파일내용이 보임
#include <stdio.h>
#include <stdlib.h>
int main()
{
printf("hello");
printf("\n");
return 1 ;
}
cat main.c >> httpd2.conf -- 두개를 쓰면 마지막에 추가된다, > 하나는 덮어쓰는것
[root@localhost ~]# cat main.c >> httpd2.conf
[root@localhost ~]# cat httpd2.conf
#include <stdio.h>
#include <stdlib.h>
int main()
{
printf("hello");
printf("\n");
return 1 ;
}
#include <stdio.h>
#include <stdlib.h>
int main()
{
printf("hello");
printf("\n");
return 1 ;
}
그래서 다시
cat main.c > httpd2.conf 해주면
[root@localhost ~]# cat httpd2.conf
#include <stdio.h>
#include <stdlib.h>
int main()
{
printf("hello");
printf("\n");
return 1 ;
}
하나만 보임
vi편집기에서 (esc 상태)
i 를 누르면 글자 처음으로 insert
a를 누르면 글자 뒤로 커서가 들어가는 insert
o를 누르면 다음행으로 커서가 들어가는 insert
dd를 누르면 line(행) 단위로 삭제가 된다
:se nu하면 라인번호 들어감
:se nonu하면 라인번호 삭제함
:q! 하면 저장안하고 나가기
[fedora20_2 . ppt]
gcc 설치하기
YUM (Yellowdog Updater Modified)
:페도라 프로젝트로 넘어 오면서 추가된 서비스 중 하나로 의존성 있는 모든 패키지까지 모두 설치
p.4
#yum install gcc
# gcc -v (버전확인하기)
gcc version 9.0.1 20190312 (Red Hat 9.0.1-0.10) (GCC)
p.7
C 언어 실습하기
[root@localhost ~]# ls
'\' anaconda-ks.cfg httpd.conf httpd2.conf main.c main.exe
[root@localhost ~]# rm main.* --main으로 시작하는 파일 지우기
rm: remove 일반 파일 'main.c'? y
rm: remove 일반 파일 'main.exe'? y
# vi main.c 들어가서
#include <stdio.h>
#include <stdlib.h>
int main()
{
printf(“hello”);
printf(“\n”);
printf("JYP");
printf(“\n”);
return 1 ;
}
적고 저장 :wq
# gcc –o main.exe main.c
# ./main.exe
하면
hello
JYP
으로 출력된다
for 반복문 사용하기
#include <stdio.h>
#include <stdlib.h>
int main()
{ 초기값 조건식
for( int i=1; i<=5; i++){ --초기값은 한번실행하고 조건식으로 넘어감
printf("hello ");
}
printf("\n");
printf("JYP");
printf("\n");
return 1;
}
# gcc -o main.exe main.c
# ./main.exe
hello hello hello hello hello --출력
JYP
정수값같이 출력하기
#include <stdio.h>
#include <stdlib.h>
int main(){ --void 리턴값이 없는 리턴형
for(int i=1; i<=5; i++){
printf("%d",i); --d는 정수출력하기
printf("hello \n ");
}
printf("\n");
printf("JYP");
printf("\n");
return 1;
}
증감식으로 표현
for(int i=5; i>=1; i--);
5hello
4hello
3hello
2hello
1hello
JYP
반대로 출력
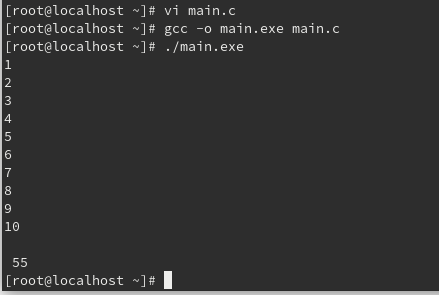
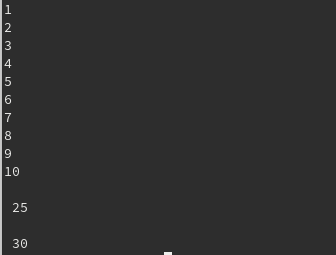
#include <stdio.h>
#include <stdlib.h>
int main(){
int s = 0;
for(int i =1; i<=10; i++){
printf("%d\n", i);
s+=i; -- s= s+i 누적연산
}
printf("\n %d \n", s);
}
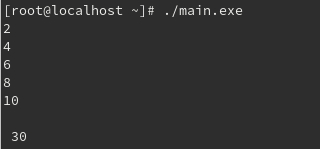
#include <stdio.h>
#include <stdlib.h>
int main()
{
int s=0;
for(int i=1; i<=10; i++){
if (i%2==0){ --2로나눈 나머지가 0이면 참(실행)
printf("%d\n",i);
s+=i;
}
}
printf("\n %d \n", s);
}
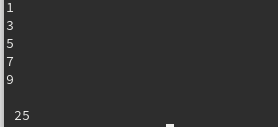
if (i%2==1){ 홀수찍기
짝수합/ 홀수합 나타내기
#include <stdio.h>
#include <stdlib.h>
int main(){
int s1=0;
int s2=0;
for(int i=1; i<=10; i++){
if (i%2==1){
printf("%d\n",i);
s1+=i;
}
if(i%2==0) {
printf("%d \n",i);
s2 +=i;
}
}
printf("\n %d \n", s1);
printf("\n %d \n", s2);
}
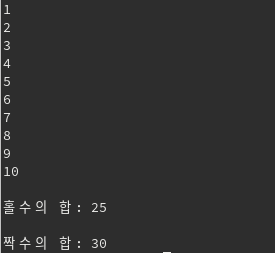
#include <stdio.h>
#include <stdlib.h>
int main(){
int s1=0;
int s2=0;
for(int i=1; i<=10; i++){
if (i%2==1){
printf("%d\n",i);
s1+=i;
}else{
printf("%d \n",i);
s2 +=i;
}
}
printf("\n홀수의 합: %d \n", s1);
printf("\n짝수의 합: %d \n", s2);
}
구구단 나타내기
#include <stdio.h>
#include <stdlib.h>
void main(){
for(int i=1; i<=9; i++){
printf("2x%d=%d ", i, 2*i);
}
prntf("\n");
}
#include <stdio.h>
#include <stdlib.h>
void main(){
for(int dan=2; dan<=9; dan++){ -- 2중 for문
for(int i=1; i<=9; i++){
printf("%dx%d=%d ", dan, i, dan*i);
}
printf("\n");
}
printf("\n");
}

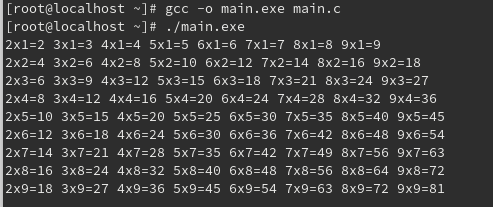
#include <stdio.h>
#include <stdlib.h>
void main(){
for(int i=1; i<=9; i++){
for(int dan=2; dan<=9; dan++){
printf("%dx%d=%d ", dan, i, dan*i);
}
printf("\n");
}
printf("\n");
}
#include <stdio.h>
#include <stdlib.h>
void main(){
for(int i=1; i<=9; i++){
for(int dan=2; dan<=9; dan++){
printf("%dx%d=%d\t", dan, i, dan*i); -- tab만큼 띄어쓰기
}
printf("\n");
}
printf("\n");
}

#include <stdio.h>
#include <stdlib.h>
void main(){
for(int dan=2; dan<=9; dan++){
for(int i=1; i<=9; i++){
printf("%dx%d=%d \n", dan, i, dan*i);
}
printf("\n");
}
printf("\n");
}

.
.
.

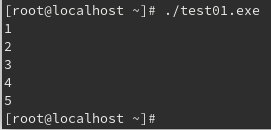
- 1부터 5까지 출력하기
#include <stdio.h>
#include <stdlib.h>
void main(){
for(int i =1; i<=5; i++){
printf("%d ", i);
}
}

#include <stdio.h>
#include <stdlib.h>
int main(){
for(int i=1; i<=5; i++){
printf("%d ", i);
printf("\n");
}
}
또는
#include <stdio.h>
#include <stdlib.h>
int main(){
for(int i=1; i<=5; i++){
printf("%d\n ", i);
}
}

#include <stdio.h>
#include <stdlib.h>
void main(){
int s=0;
for(int i=1; i<=5; i++){
printf("%d", i);
s+=i;
printf("\n");
}
printf("\n====\n");
printf("누적합: %d ",s);
}
기본형 3가지
숫자,문자,오브젝트 (객체)
-구구단 7단만 출력하기
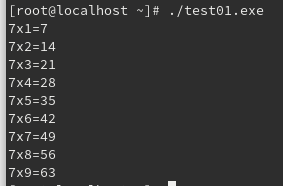
#include <stdio.h>
#include <stdlib.h>
void main(){
int dan = 7;
for(int i =1; i<=9; i++){
printf("%dx%d=%d",dan ,i, dan*i);
printf("\n");
}
}
-----
#include <stdio.h>
#include <stdlib.h>
void main(){
for(int i =1; i<=9; i++){
printf("7x%d=%d\n",i, 7*i)
}
}

계정만들기
useradd 대신 adduser를 써도 된다

계정삭제하기
userdel -rf (rf의 의미는 r 하위디렉토리 f 강제로 del제거한다)
man userdel -> userdel에 대한 메뉴얼 확인하기

ppt p.21 Runlevel 실행하기
#> init 0 - runlevel 0 실행하기 (종료)
#> init 3 - runlevel 3 실행하기 (TUI-환경)
#> init 5 - runlevel 5 실행하기 (X-윈도우)
#> init 6 - runlevel 6 실행하기(재부팅)
인터프리터 언어와 컴파일 언어의 차이
인터프리터 언어는 한줄한줄 바로 명령어를 실행하는 언어 (파이썬) 컴파일x
컴파일 언어는 씨언어 에서 .exe파일 만들어지듯 한번에 실행이 된다 (c언어, c++,자바)
컴파일 되는 과정을 거치는것을 빌드라고 한다
컴파일 이 끝나면 기계어가 되는 것 (고급언어 -> 저급언어)
초반에는 인터프리터 언어가 더 빠르지만
반복될수록 인터프리터 언어가 빠르다 ( 무조건인 것은 아님 )
p.27 멀티유저
멀티유저 시스템이란 여러 유저(사용자)가 존재하는것을 의미한다.
또한 각 유저는 권한이 다르다.
시스템유저, 일반유저
유저를 계정(account) 이라고도 한다.
root유저
root 유저는 시스템의 총 관리자로서 “슈퍼유저” 라고도 부른다.
root 유저는 모든 파일을 다룰 수 있는 권한이 있다.
root 유저는 파일 삭제 변경 시 유의하여야 합니다.
[root@localhost~]# 즉# 이면 root , $ 면 일반유저로 생각할 수 있다.
* 사실 실질적인 기준은 아니다 #,$는 쉘의 종류이다
(리눅스에는 이렇게 구분해도 크게 문제는 없다)
su : 권한은 root 지만 환경은 일반유저 환경이다.
su – : root 로 접속한 것과 동일하다
명령어
1)cd: 디렉토리 변경 2)ls: 목록보기
[root@localhost ~]# cd /var/www/html -- 디렉토리변경
[root@localhost html]# ls --목록보기
index.html index.php
[root@localhost html]#
.html 과 .htm은 동일하다

W3Schools offers free online tutorials, references and exercises in all the major languages of the web. Covering popular subjects like HTML, CSS, JavaScript, Python, SQL, Java, and many, many more.
웹프로그램에 대한 내용이 간단하게 정리되어있다
'리눅스' 카테고리의 다른 글
| [ 15일차 ] 리눅스 쉘 프로그램 [fedora20_8_shell. ppt] (0) | 2022.06.10 |
|---|---|
| [ 14일차 ] 리눅스 연습문제 + [fedora20_4 ppt] 이론, [fedora20_5_apm ppt] 이론 (0) | 2022.06.10 |
| [ 14일차 ] 데몬리스타트, 이름변경하기 명령어 (0) | 2022.06.10 |
| [ 13일차 ] html (0) | 2022.06.10 |
| [ 12일차 ] FEDORA 30 (0) | 2022.06.10 |


